Table of Content

Introduction

In, this blog we will tell you how to create a working DIY Arduino Controlled Bluetooth Car at home 2024 this is the easiest way to create an Arduino car by doing least afford.
How to make Arduino Bluetooth Car Components Image

Components:

1.) 1 x Arduino Uno R3 SMD Board.
2.) 1 x L298 Motor Driver Module.
3.) 4 x BO Motor Dual Shaft.
4.) 4 x BO Motor Wheels.
5.) 1 x Hc-05 Wireless Bluetooth.
6.) 2 x 9v battery / Power Bank (Recommended).
7.) 2 x Cardboard sheets for the base.
8.) 20 x Jumper wires.

About Components:

It is a microcontroller that reads input and converts it into an output. Ex: When you touch the direction key on a mobile screen, the Direction of the car will change accordingly.
In this case, Arduino gets input when touched on direction keys and moves the car accordingly as an output. It is like the brain of The Car which gives commands to the motors.

It works like connecting a link between Motors and Arduino. It supplies electricity to motors and LED (if added). It works as the heart of the car this supplies the energy to the motor.

Bo Motor from inside gear view

It can deliver high torque (turning force) at low speed. It helps the car to move ahead with a heavyweight. Those gears in the above image help the motor to deliver high torque.

It provides a wireless connection between Arduino Car and a device used like Mobile, PC, Laptop, or Tablet. That is a special ability of this car.

It is recommended to use a power bank instead of a 9v battery because a power bank is easy to charge again and its charging life is also more than a 9v battery and it will also cost you less as compared to 9v batteries as you need to purchase it, again and again, you can also use 9v batteries if you want but you will be required 2 batteries as 1 battery is not enough to power 4 motors.

These are simple to use wires these wires come already pealed from top and bottom you also donā€™t need to solder them which makes work easy and handy. And you can only use jumper wires in Arduino for connection.

Getting Started

Letā€™s get started in making an amazing Arduino Bluetooth car easily without any issues. I will explain to you the method that always works because itā€™s easy to implement.

Steps:

1.) Creating Structure of Car
2.) All components Circuit
3.) Arduino Programming
4.) Arduino Bluetooth app setup
5.) Testing

Creating Structure of Car:

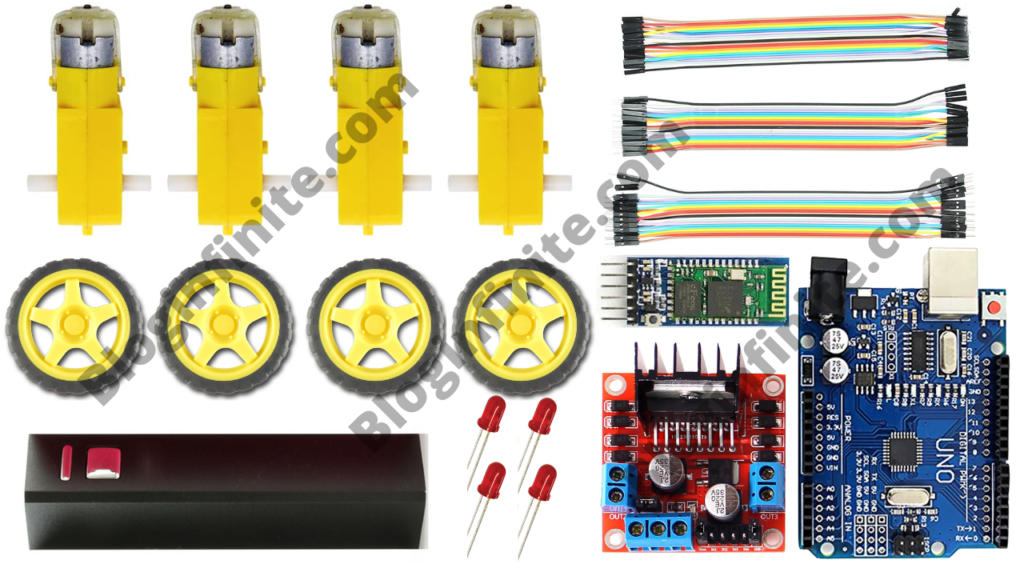
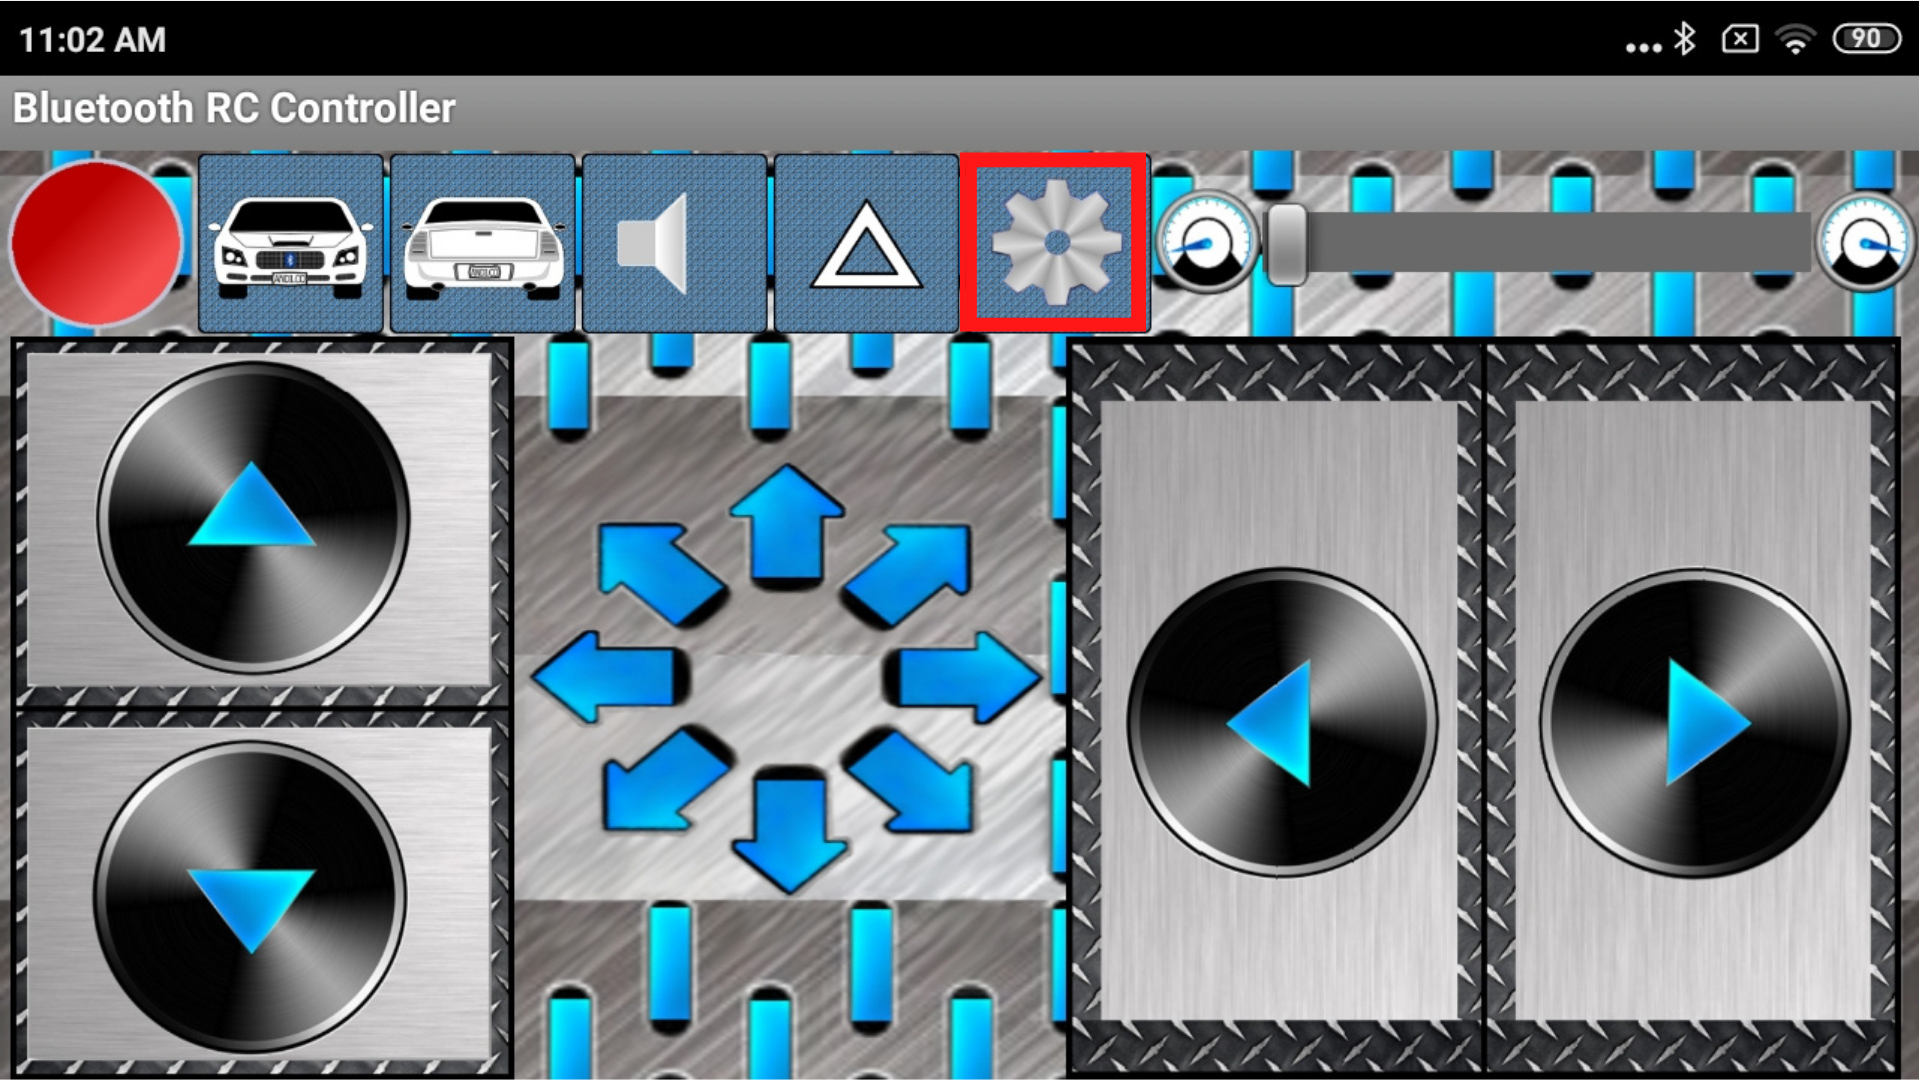
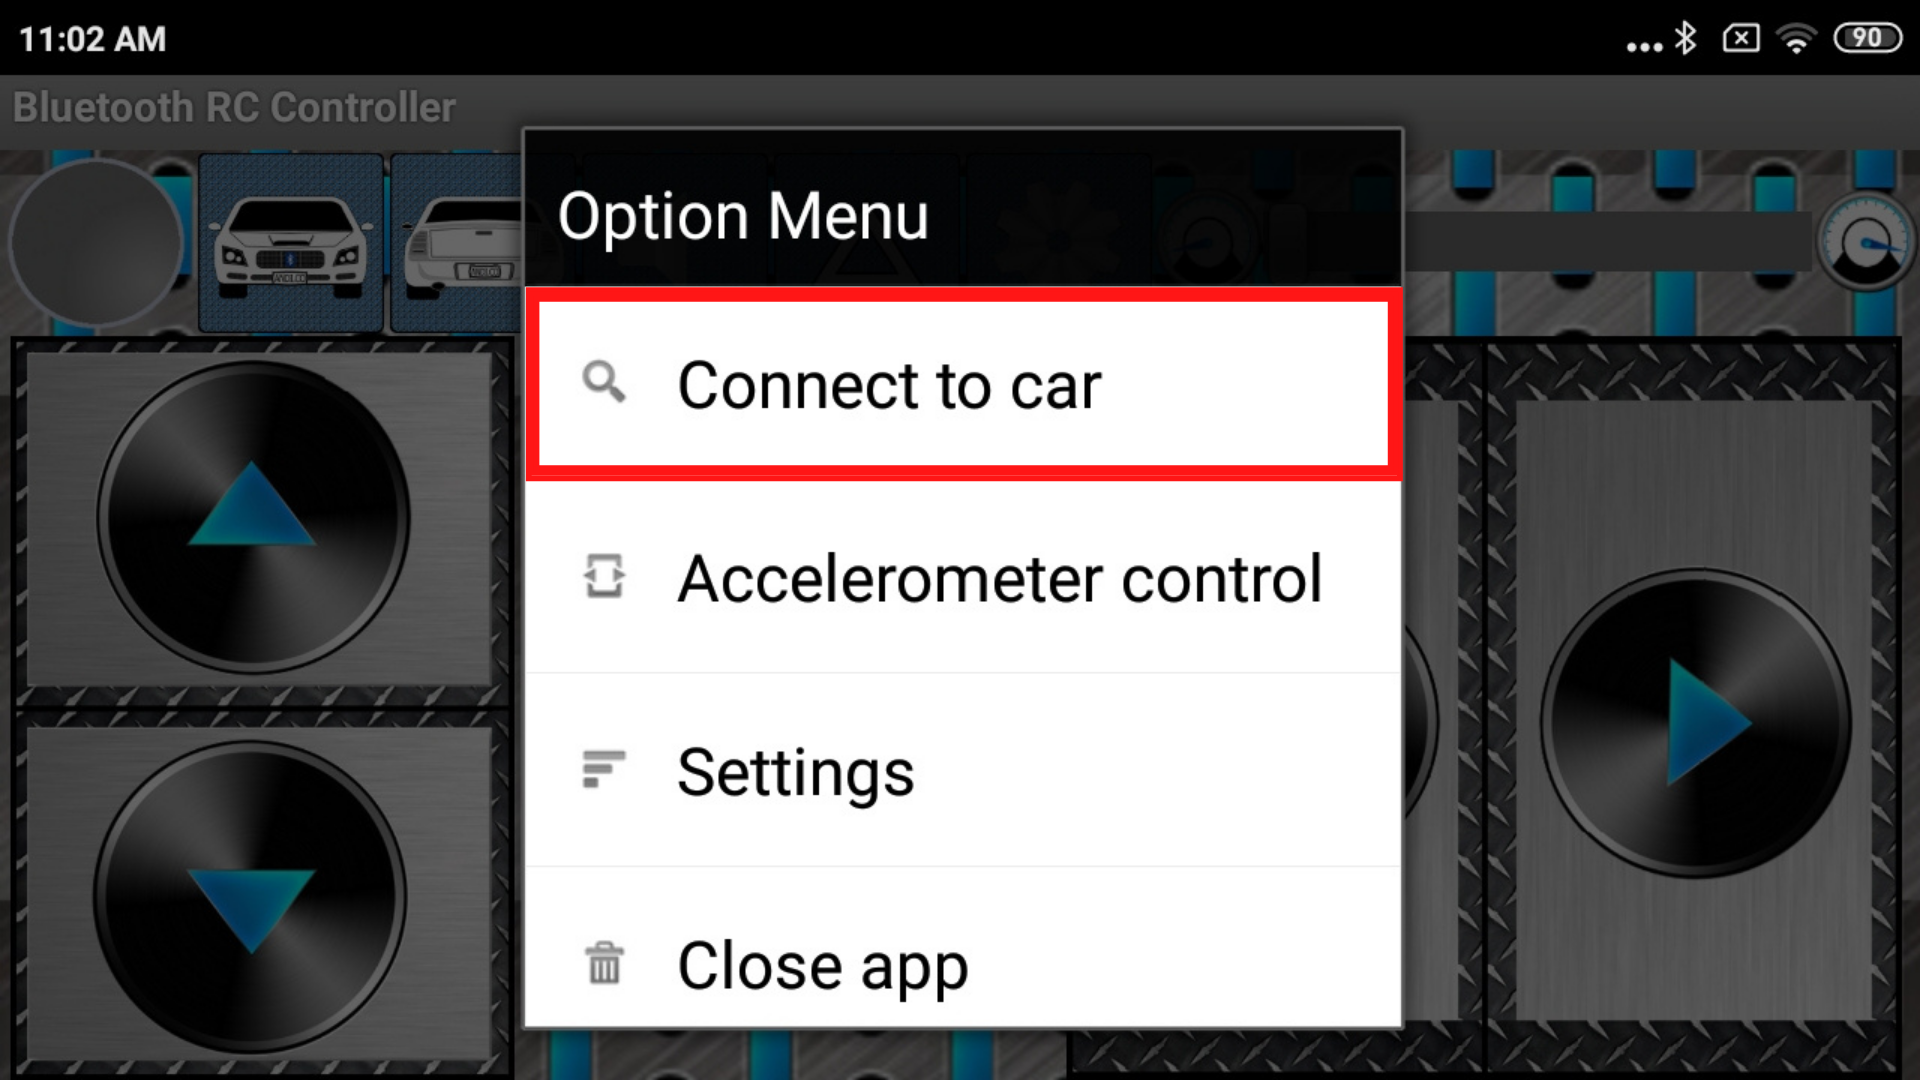
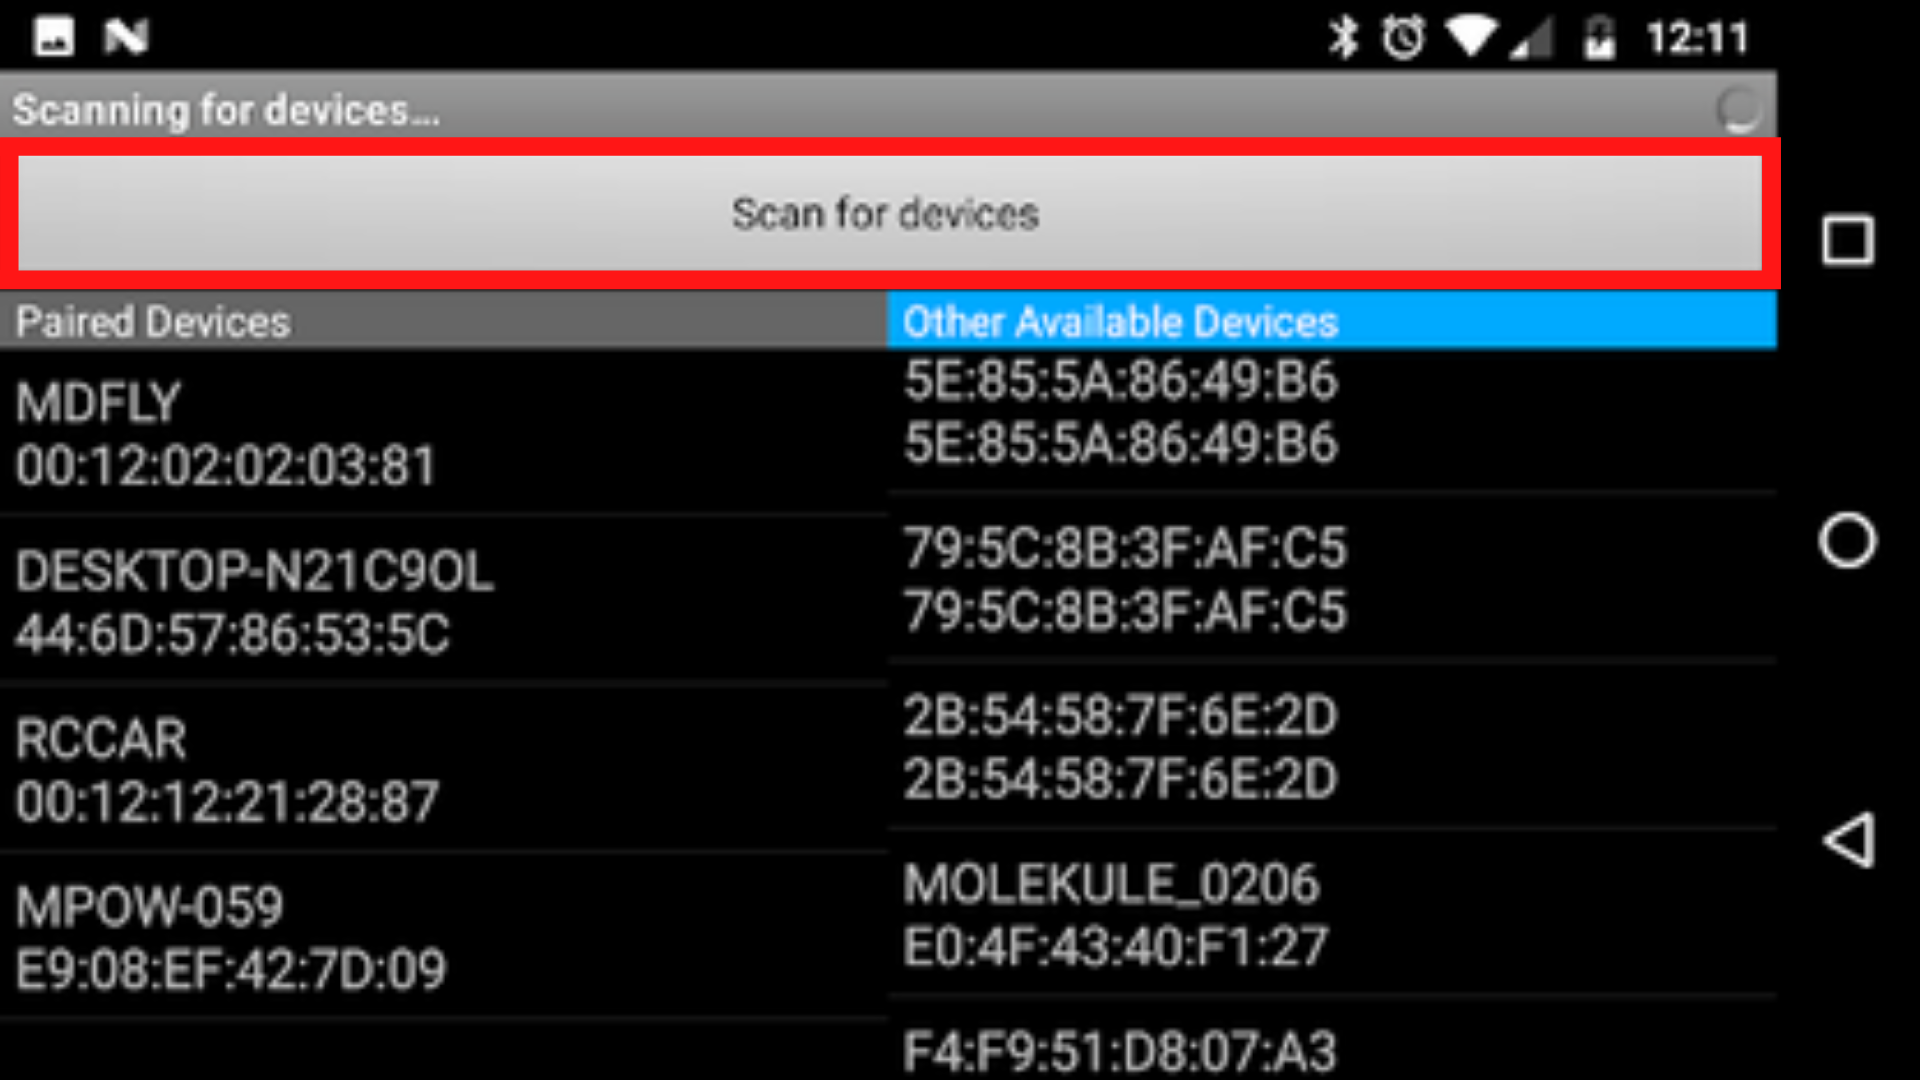
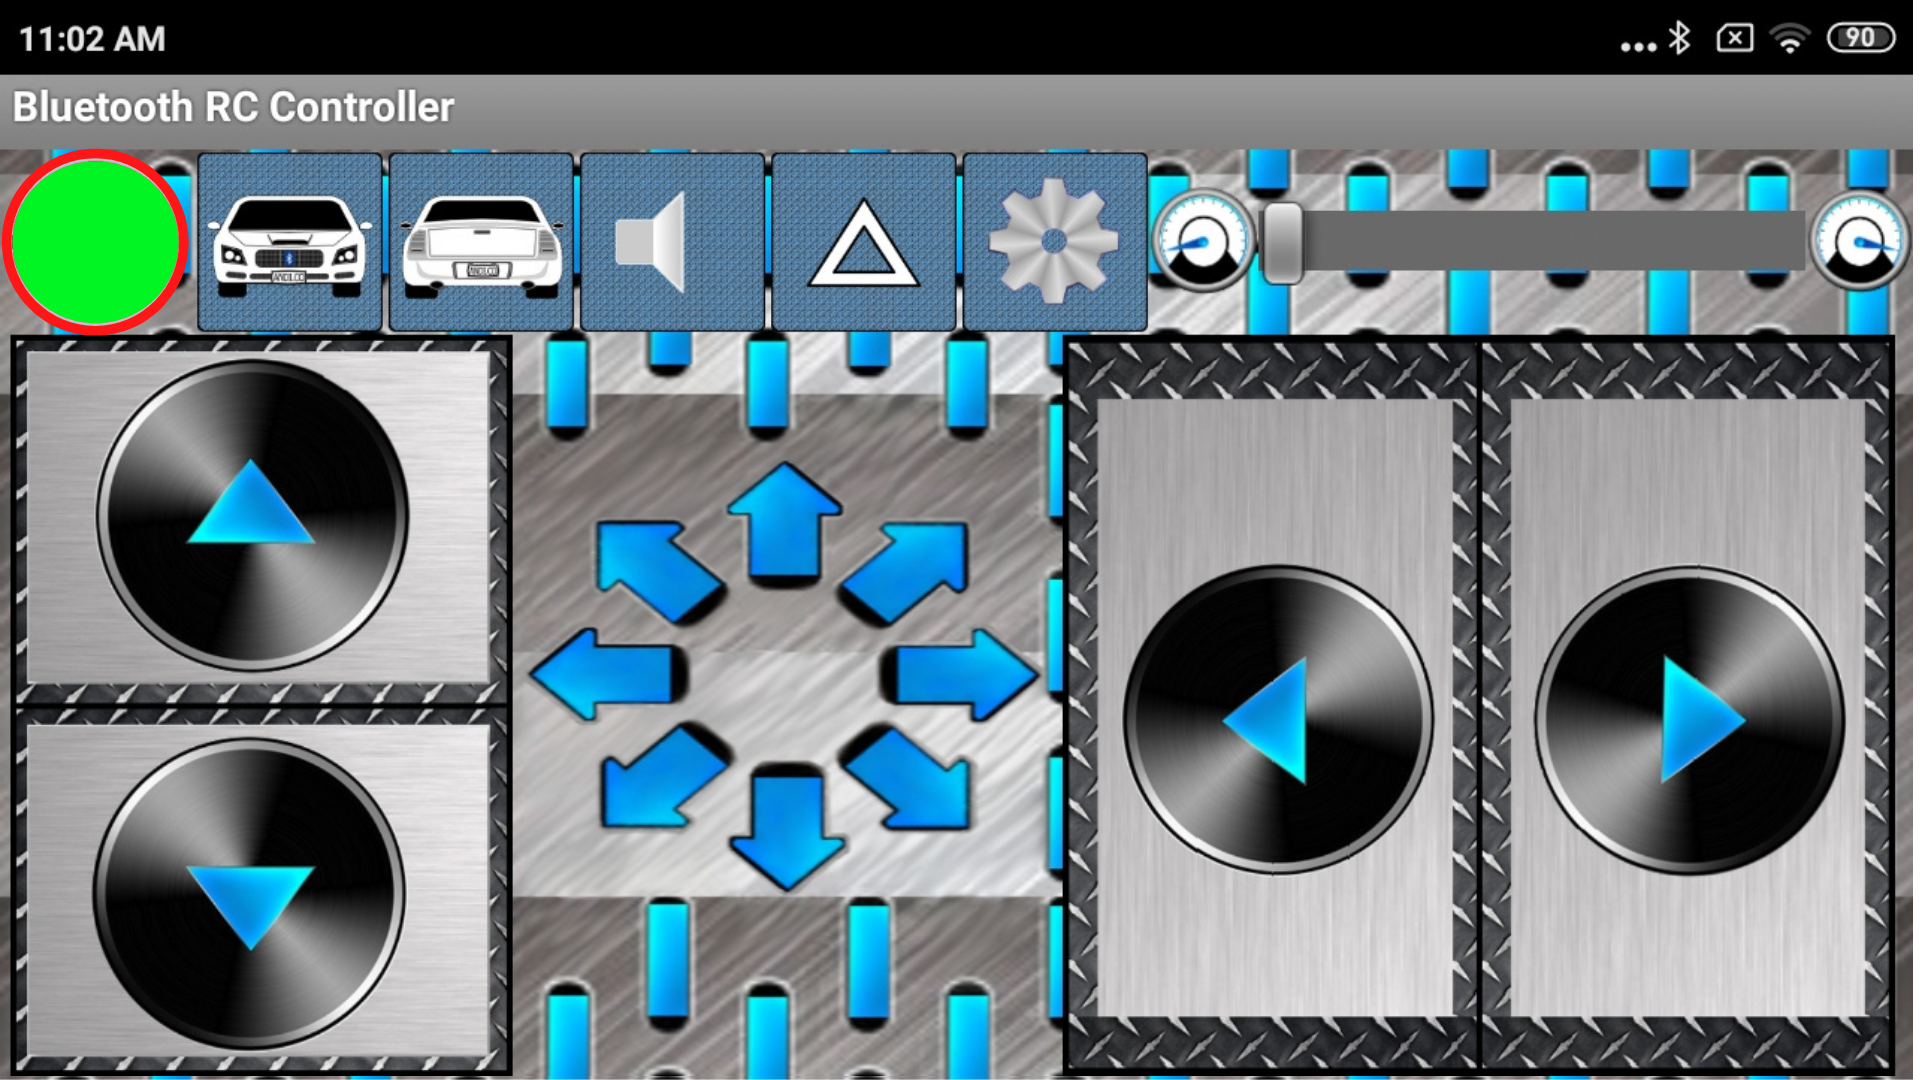
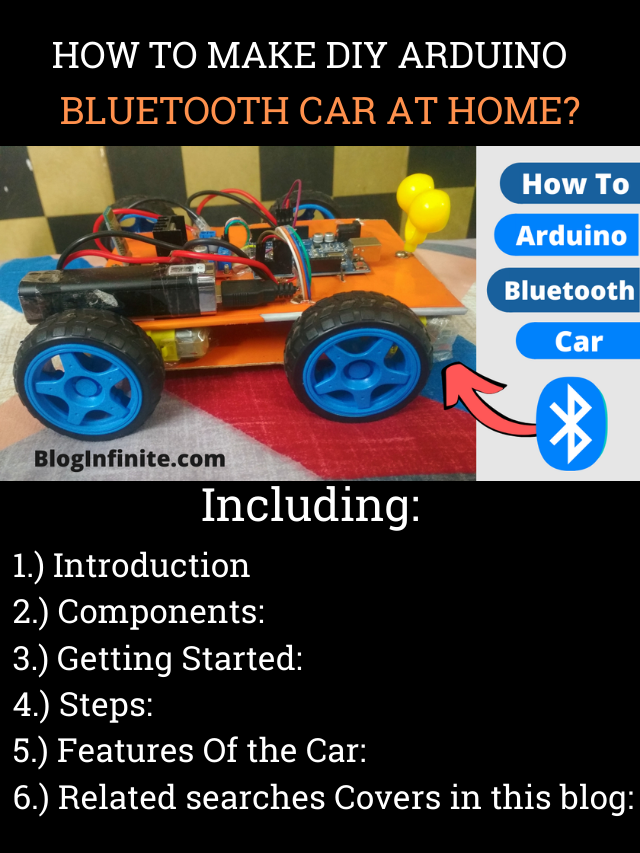
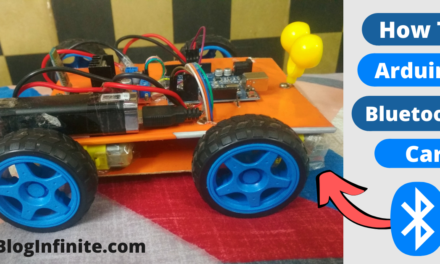
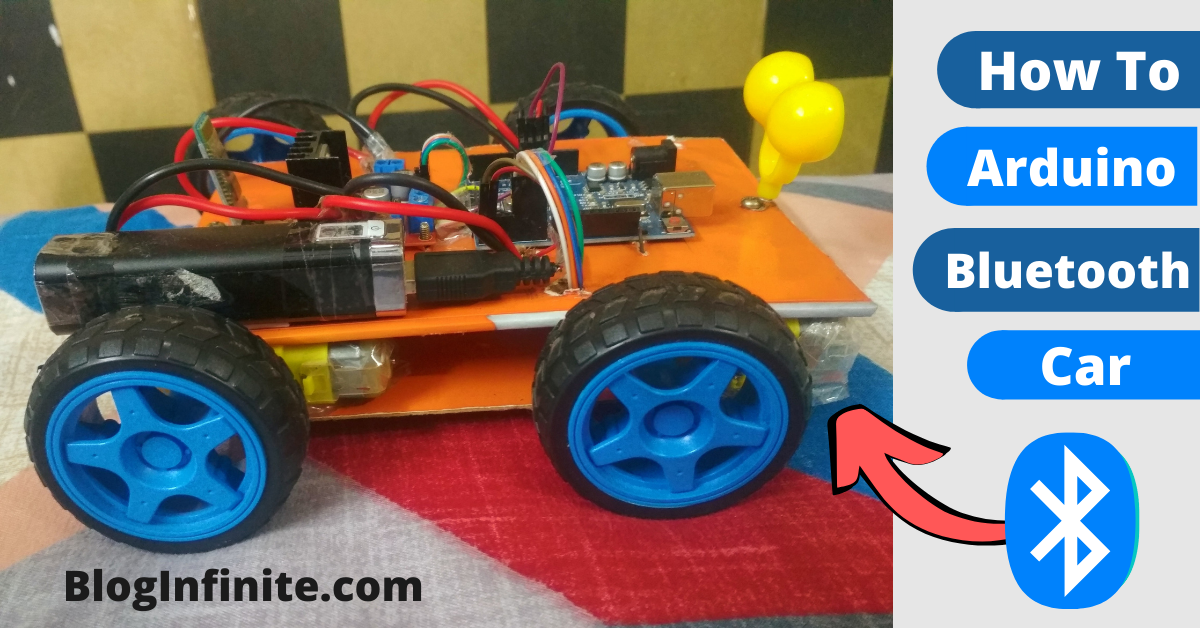
The Cardboard Sheet is going to be the base of the car.
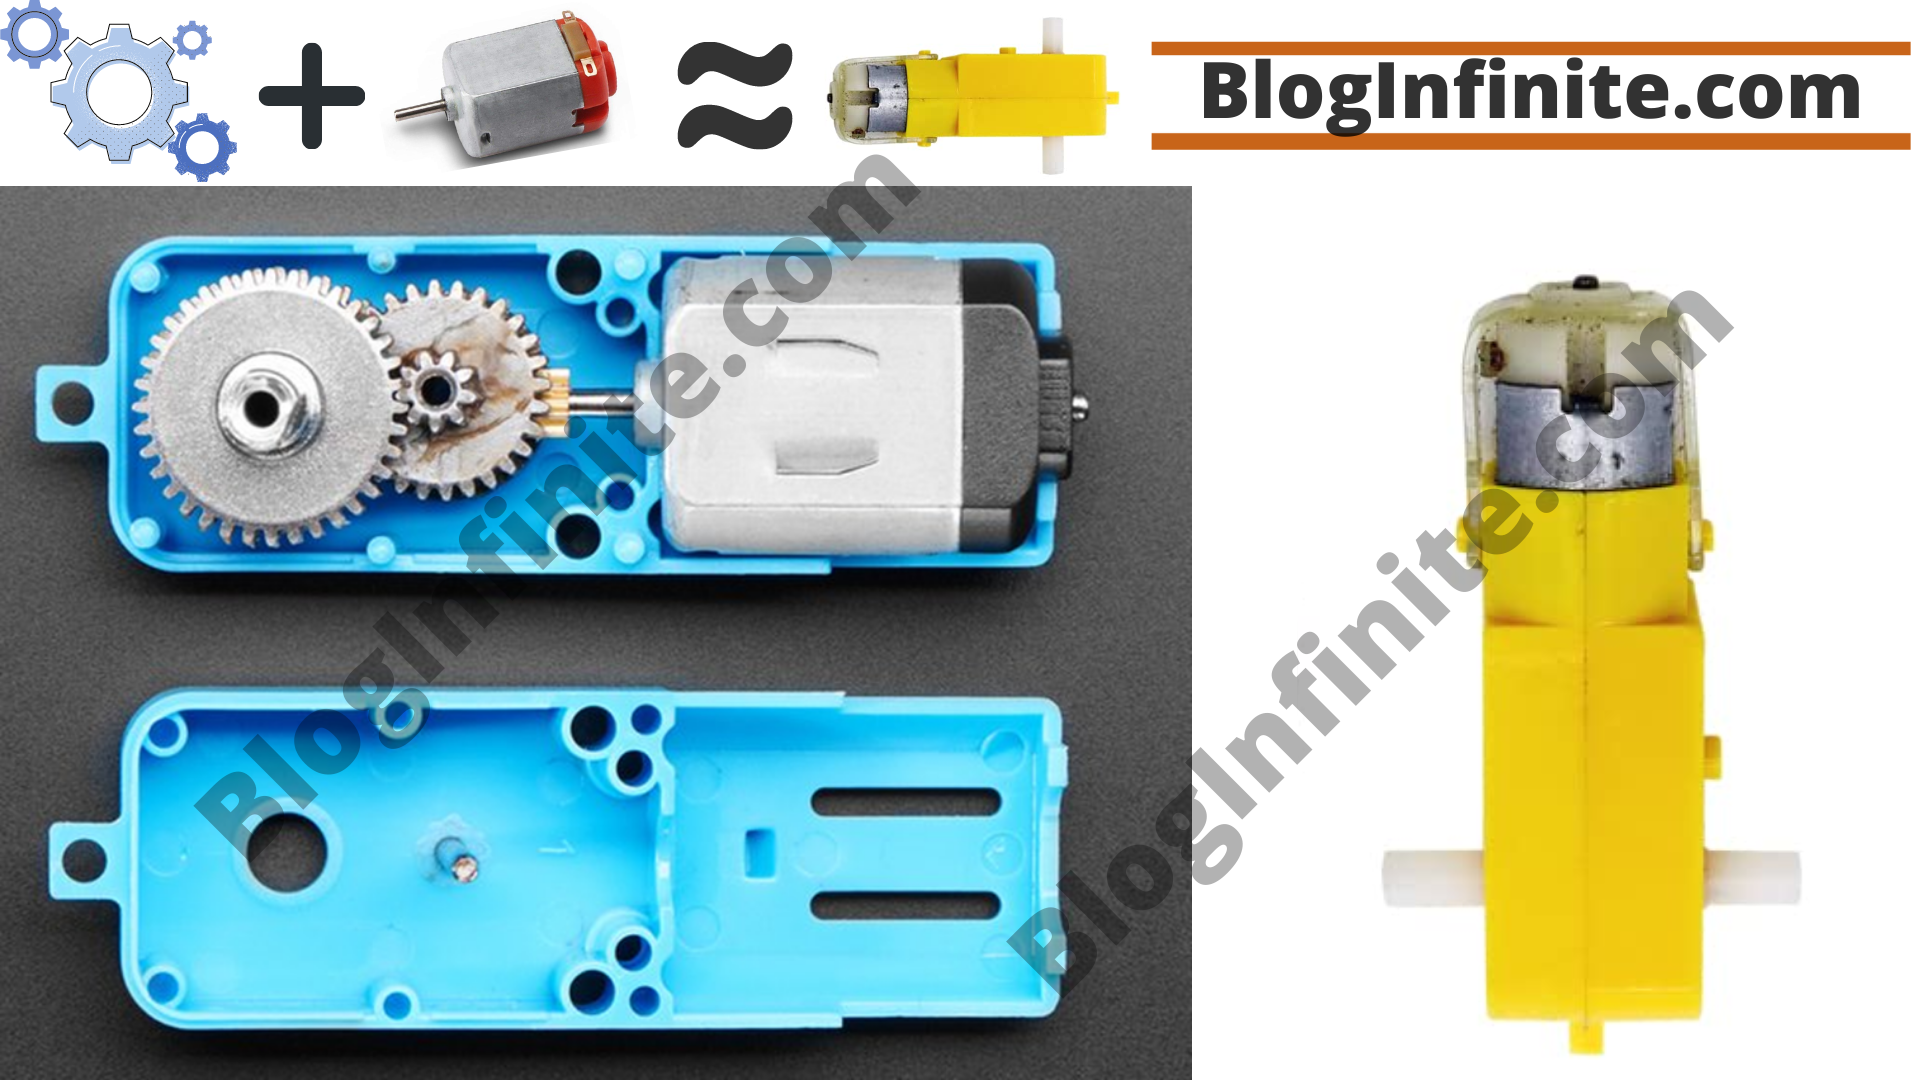
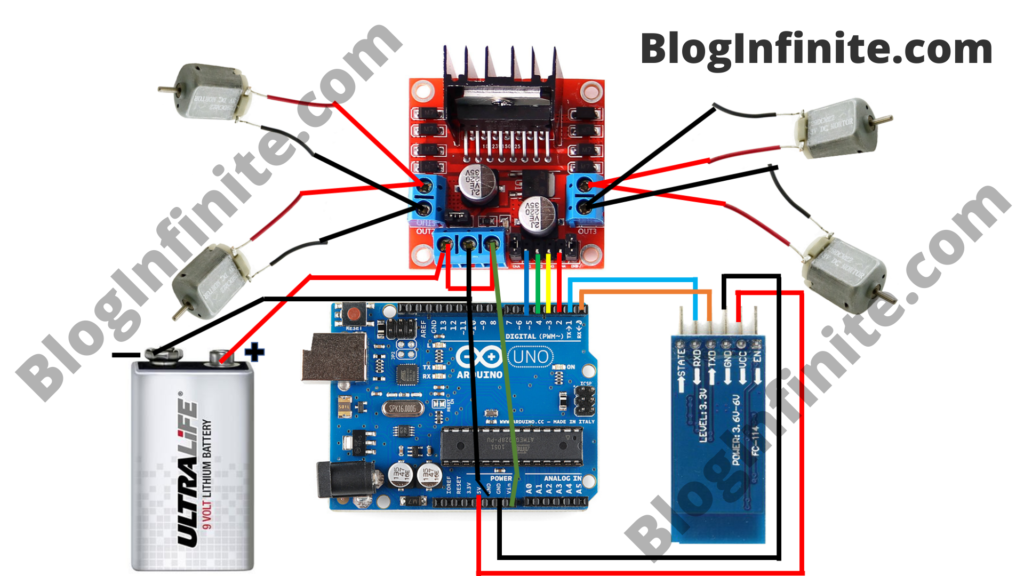
1.) Solder your BO motors with wire try to purchase already soldered motors that make work easier.
2.) Take one sheet of Cardboard and place 1 Bo motor in each corner.
3.) After That connect all the wheels to the motor.
4.) Cover it with another cardboard and place all components by making space.

All Component CIRCUITS:

BlogInifnite.com Arduino Car Circuit

Arduino and Motor Driver Circuit:

1.) VIN OF ARDUINO ā€“ 5V OF MOTOR DRIVER
2.) GND OF ARDUINO ā€“ GND OF MOTOR DRIVER
3.) IN-1 ā€“ Digital pin-3
4.) IN-2 ā€“ Digital pin-4
5.) IN-3 ā€“ Digital pin-5
6.) IN-4 ā€“ Digital pin-6

Arduino and HC-05 Bluetooth Module Circuit:

1.) TX (Arduino) ā€“ RX (Bluetooth Module)
2.) RX (Arduino) ā€“ TX (Bluetooth Module)
3.) VCC (Arduino) ā€“ 5V (Bluetooth Module)
4.) GND (Arduino) ā€“ GND (Bluetooth Module)

Diagram Explain

Motor Driver and Battery Circuit:

1.) 12V OF MOTOR DRIVER ā€“ POSITIVE OF BATTERY
2.) GND OF MOTOR DRIVER ā€“ NEGATIVE OF BATTERY

Motor Driver Connection:

1.) 12V OF MOTOR DRIVER ā€“ 5V OF MOTOR DRIVER (Very Important It help Motor to get started)

Motor Driver and Motors:

1.) Join Both the Positive side and negative sites of the motor and connect in Output 1.
2.) Join Both the Negative side and negative sites of the motor and connect in Output 2.
3.) Complete the same thing with the other two motors and join with the motor driver respectively.
				
					/*
Code Name: HOW TO MAKE DIY ARDUINO BLUETOOTH CAR AT HOME? (WORKING) 
Code URI: https://bloginfinite.com/how-to-make-diy-working-arduino-bluetooth-car-at-home/
Author: BlogInfinite
Description: This Code is used to control a Arduino bluetooth car using mobile this code is uploaded in Arduino
App URI: https://bit.ly/3uuKT7t
Version: 1.0
License: Remixing or Changing this Thing is allowed. Commercial use is not allowed.
*/

#define in1 3 //L298n Motor Driver pins.
#define in2 4
#define in3 5
#define in4 6
#define LED 13
int command; //Int to store app command state.
int Speed = 204; // 0 - 255.
int Speedsec;
int buttonState = 0;
int lastButtonState = 0;
int Turnradius = 0; //Set the radius of a turn, 0 - 255 Note:the robot will malfunction if this is higher than int Speed.
int brakeTime = 45;
int brkonoff = 1; //1 for the electronic braking system, 0 for normal.
void setup() {
  pinMode(in1, OUTPUT);
  pinMode(in2, OUTPUT);
  pinMode(in3, OUTPUT);
  pinMode(in4, OUTPUT);
  pinMode(LED, OUTPUT); //Set the LED pin.
  Serial.begin(9600);  //Set the baud rate to your Bluetooth module.
}

void loop() {
  if (Serial.available() > 0) {
    command = Serial.read();
    Stop(); //Initialize with motors stoped.
    switch (command) {
      case 'F':
        forward();
        break;
      case 'B':
        back();
        break;
      case 'L':
        left();
        break;
      case 'R':
        right();
        break;
      case 'G':
        forwardleft();
        break;
      case 'I':
        forwardright();
        break;
      case 'H':
        backleft();
        break;
      case 'J':
        backright();
        break;
      case '0':
        Speed = 100;
        break;
      case '1':
        Speed = 140;
        break;
      case '2':
        Speed = 153;
        break;
      case '3':
        Speed = 165;
        break;
      case '4':
        Speed = 178;
        break;
      case '5':
        Speed = 191;
        break;
      case '6':
        Speed = 204;
        break;
      case '7':
        Speed = 216;
        break;
      case '8':
        Speed = 229;
        break;
      case '9':
        Speed = 242;
        break;
      case 'q':
        Speed = 255;
        break;
    }
    Speedsec = Turnradius;
    if (brkonoff == 1) {
      brakeOn();
    } else {
      brakeOff();
    }
  }
}

void forward() {
  analogWrite(in1, Speed);
  analogWrite(in3, Speed);
}

void back() {
  analogWrite(in2, Speed);
  analogWrite(in4, Speed);
}

void left() {
  analogWrite(in3, Speed);
  analogWrite(in2, Speed);
}

void right() {
  analogWrite(in4, Speed);
  analogWrite(in1, Speed);
}
void forwardleft() {
  analogWrite(in1, Speedsec);
  analogWrite(in3, Speed);
}
void forwardright() {
  analogWrite(in1, Speed);
  analogWrite(in3, Speedsec);
}
void backright() {
  analogWrite(in2, Speed);
  analogWrite(in4, Speedsec);
}
void backleft() {
  analogWrite(in2, Speedsec);
  analogWrite(in4, Speed);
}

void Stop() {
  analogWrite(in1, 0);
  analogWrite(in2, 0);
  analogWrite(in3, 0);
  analogWrite(in4, 0);
}

void brakeOn() {
  //Here's the future use: an electronic braking system!
  // read the pushbutton input pin:
  buttonState = command;
  // compare the buttonState to its previous state
  if (buttonState != lastButtonState) {
    // if the state has changed, increment the counter
    if (buttonState == 'S') {
      if (lastButtonState != buttonState) {
        digitalWrite(in1, HIGH);
        digitalWrite(in2, HIGH);
        digitalWrite(in3, HIGH);
        digitalWrite(in4, HIGH);
        delay(brakeTime);
        Stop();
      }
    }
    // save the current state as the last state,
    //for next time through the loop
    lastButtonState = buttonState;
  }
}
void brakeOff() {

}


Arduino Programming:

1.) Arduino IDE Software.
2.) Connect Arduino Cable with Arduino and Laptop.
3.) Copy ā€“ Paste the code given above and click verify.
4.) Select Your Board Type under Tools > Boards in our case it will be Arduino Uno.
5.) Click Upload Code and BOOM!! Thatā€™s all.

NOTE: Make Sure to Remove the HC-05 Bluetooth module and battery / Power Bank from the Arduino board while uploading code it causes serious damage to them. Well, it is always recommended to remove all connections while Uploading code.

Arduino Bluetooth app setup:

1.) Open Play Store and Use Bluetooth RC Car.
2.) Click Setting > Connect to Car and select your Bluetooth module. It will show a green light when connected.

Testing:

1.) Make Sure that your HC-05 Bluetooth module connects properly and there should not be any delay in between sending the commands.
2.) Make Sure that there should not be any gap or loos in between the Motor and Tyre this will slow the speed and performance of the car. And then check whether all motor is working or not.

Features Of the Car:

1.) This Car can be Controlled from 11 m if made properly as teched in this blog as the maximum range of the HC-05 Bluetooth module is 11 m.
2.) This car Can carry up to 2 kg objects and move easily.
3.) This car is mobile Controlled and can be a laptop.

Related searches Covers in this blog:

Arduino IDECar diagram images
Arduino Car ProjectBluetooth Car code
Remote Control CarArduino Uno codeĀ 
Bluetooth ControllerBest DIY Projects
Arduino Bluetooth ModuleFeatures Of Arduino Car
Arduino Car Not WorkingMake working RC Car cheaply

Web Story

If you have any queries regarding this project you can comment down below and also can contact us on our contact page If you Want to write for us you can apply for it at Write For Us.